Vector animation is a powerful way to bring illustrations to life. With apps like Alight Motion, creators can animate directly on their mobile devices without needing complex desktop software. In this guide, we’ll explore how to create and animate vector drawings in Alight Motion, based on the techniques from the tutorial video titled “Vector Animation – Animating in Alight Motion”.
Whether you’re an aspiring animator or a digital artist looking to expand your skills, this guide breaks down every step clearly. Let’s dive into the process from drawing your first vector shape to exporting a full animated sequence.
What Is Alight Motion?
Alight Motion is a feature-rich mobile app for motion graphics, video editing, and animation. It supports layers, keyframe animation, vector drawing, and even effects like color grading and blending. Unlike other mobile editors, it combines both raster and vector support, making it ideal for frame-by-frame animation.
🎨 Step 1: Setting Up Your Project
To start, open Alight Motion and tap the “+” button to create a new project.
Choose your settings:
- Resolution: Common options are 1080p (1920×1080) or 720p.
- Frame rate: 30 FPS is smooth and widely used for animations.
- Background: You can leave it black or choose a custom color.
Once your project is set, you’ll see the main editing interface with the timeline at the bottom and a blank canvas above.
✏️ Step 2: Start Vector Drawing
In Alight Motion, you can draw using the vector drawing tool, which works much like the pen tool in apps like Adobe Illustrator.
Tools you’ll use:
- Pen Tool: Tap to place points and drag to curve lines.
- Selection Tool: Adjust anchor points and curves after drawing.
- Fill and Stroke: Control the inside color and outline of each shape.
Start by sketching basic shapes such as a hand, arm, or face. These can be separate layers so that they animate independently. The key here is layer separation—draw each movable part as a different vector layer.
For example:
- Head = Layer 1
- Eyes = Layer 2
- Left Arm = Layer 3
- Right Arm = Layer 4
This structure helps during animation since you can move parts individually.
🧹 Step 3: Organize Layers
As you draw more components, you may end up with 10 or more layers. To keep things organized:
- Name your layers (e.g., “hand_left”, “eye_right”).
- Group related layers (like fingers grouped under “hand”).
- Use color coding if needed (some users assign colors to layers for quick reference).
Proper organization saves time when you start animating and makes the project easier to edit later.
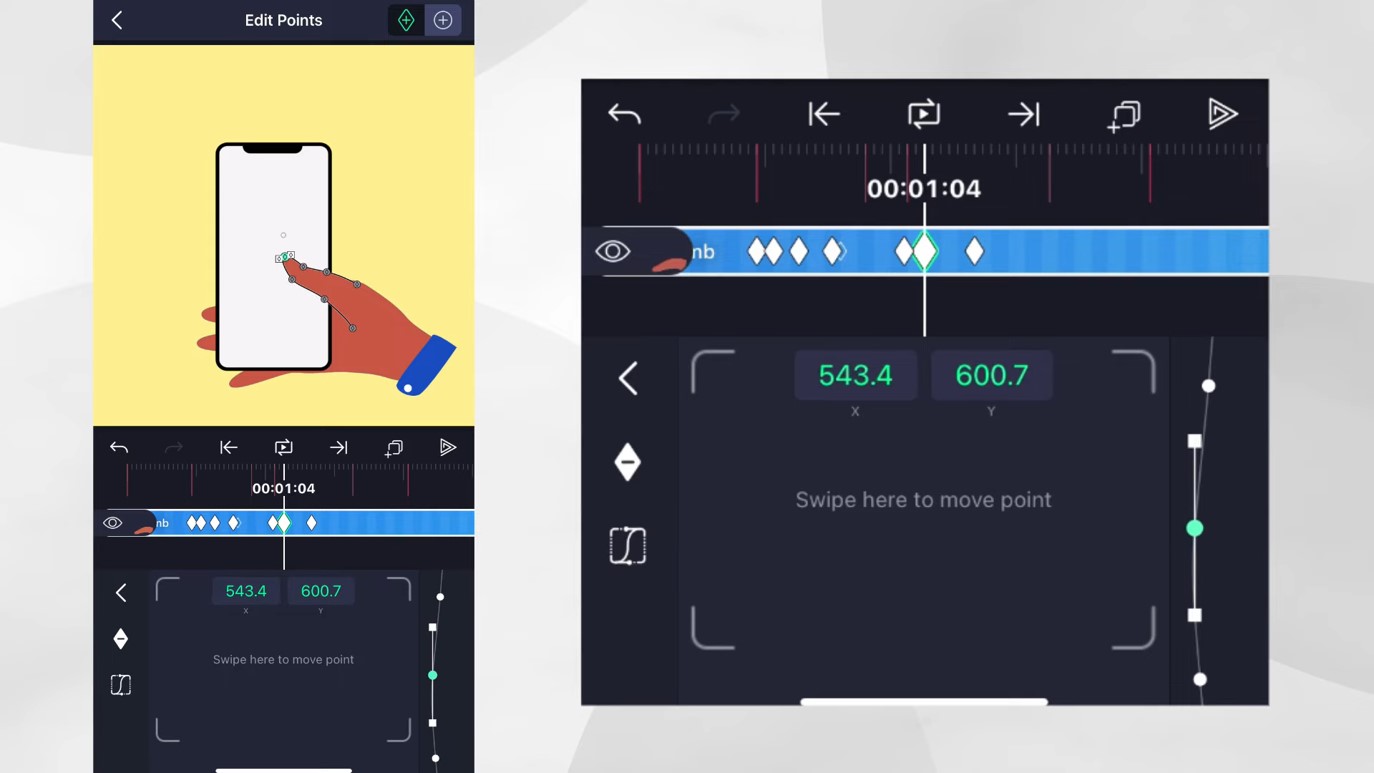
⏱️ Step 4: Add Keyframes
With your drawing ready, it’s time to animate.
Keyframe Basics:
- A keyframe marks the start or end point of any change (position, rotation, scale).
- Alight Motion will automatically animate the in-between frames.
To animate a hand wave:
- Select the hand layer.
- Move the playhead to the start of the timeline.
- Tap “+” to add a position or rotation keyframe.
- Move the playhead to 1 second forward.
- Rotate the hand slightly upward.
- Another keyframe is added automatically.
Now, when you play back, the hand moves from the original to the new position.
🎀 Step 5: Use Easing and Curves
To make your animation feel natural, apply easing curves.
Instead of linear motion (which looks robotic), easing lets you:
- Start slowly and end fast (ease in).
- Start fast and slow down (ease out).
- Combine both for a smooth, bouncy effect.
Alight Motion offers preset curves, or you can create custom curves using the graph editor. Use these especially for motions like waving, blinking, or bouncing.
🔁 Step 6: Looping and Repetition
Many animations require loops—like a character blinking every few seconds or a background object floating endlessly.
Here’s how to loop:
- Select keyframes that form a single motion cycle (e.g., up and down of a jump).
- Copy and paste them at later points in the timeline.
- Adjust spacing to control timing.
For complex loops, you can duplicate the layer and offset the timing to stagger motions.
⚙️ Step 7: Refine and Polish
Animation is all about refinement. Play your sequence several times and watch for:
- Jerky transitions
- Misaligned objects
- Too-fast or too-slow movements
Fixing these involves:
- Adjusting anchor points
- Adding or deleting keyframes
- Smoothing curves
- Re-layering objects to fix overlap issues
Pro tip: Zoom in on the timeline to work on finer motions like blinking, finger movement, or hair bounce.
📦 Step 8: Export Your Animation
When your animation is complete:
- Tap the export icon (usually top right).
- Choose export format:
- MP4 for video
- GIF or PNG Sequence for animation with transparent background
- Set resolution, frame rate, and quality.
- Tap “Export” and wait for rendering.
Make sure to preview the final file to check for any glitches before sharing.
✅ Tips & Tricks from the Tutorial
- Use anchor points wisely. These determine where a part rotates from. For example, an arm should rotate from the shoulder, not the center.
- Keep vector paths simple. Too many points can make movement stiff.
- Save often. Alight Motion can crash with complex projects, so export versions or use the save feature.
- Experiment with motion blur. It adds realism to fast movements.
- Combine with audio. You can import soundtracks to time animations precisely to music or voiceovers.
🎯 Who Should Use This?
This workflow is great for:
- Beginner animators learning frame-by-frame techniques
- Digital artists who want to explore motion graphics
- Social media creators making GIFs, memes, or reels
- Educators creating animated tutorials
It’s especially useful for people who don’t have access to desktop tools like Adobe After Effects or Animate.
🧠 Why Vector Animation?
Vector animations are resolution-independent, meaning they stay crisp no matter how much you zoom in. This is great for:
- Creating assets for games
- Animating logos and icons
- Making high-quality content for YouTube or social media
Because Alight Motion supports vectors, you can scale your artwork freely without pixelation.
Final Words
Alight Motion gives you the power to create beautiful vector animations entirely on your mobile device. With tools like keyframe control, bezier curves, and vector drawing, the only limit is your imagination. Whether you’re animating a simple character wave or a full music video, mastering these steps will take your creativity to the next level.
If you’re ready to start animating, open Alight Motion and experiment today. Every project you create helps build your skills and style. Happy animating!