Motion graphics are no longer just a visual extra in modern apps. Today, they are a core part of User Interface (UI) design. Instead of flat, lifeless screens, users now expect smooth transitions, responsive elements, and animations that react to their actions. When done well, UI motion graphics guide the user’s eye, explain what’s happening, and make an app feel alive and enjoyable to use.
In this tutorial, we will use Alight Motion to recreate a professional UI animation inspired by the Uber app. You will learn how to build everything from bouncing text and looping loaders to morphing buttons, scrolling text, and even a 3D card flip.
Whether you are just learning about keyframes or already comfortable working with null objects, masking, and graph editors, this walkthrough will help you push your UI animation skills to the next level.
The Bouncing Text & Dynamic Background
Every great app begins with a strong first impression. That usually comes from a splash screen or a loading animation. Here, we start by creating a playful, bouncing text animation that transitions into a logo reveal.
Setting the Stage
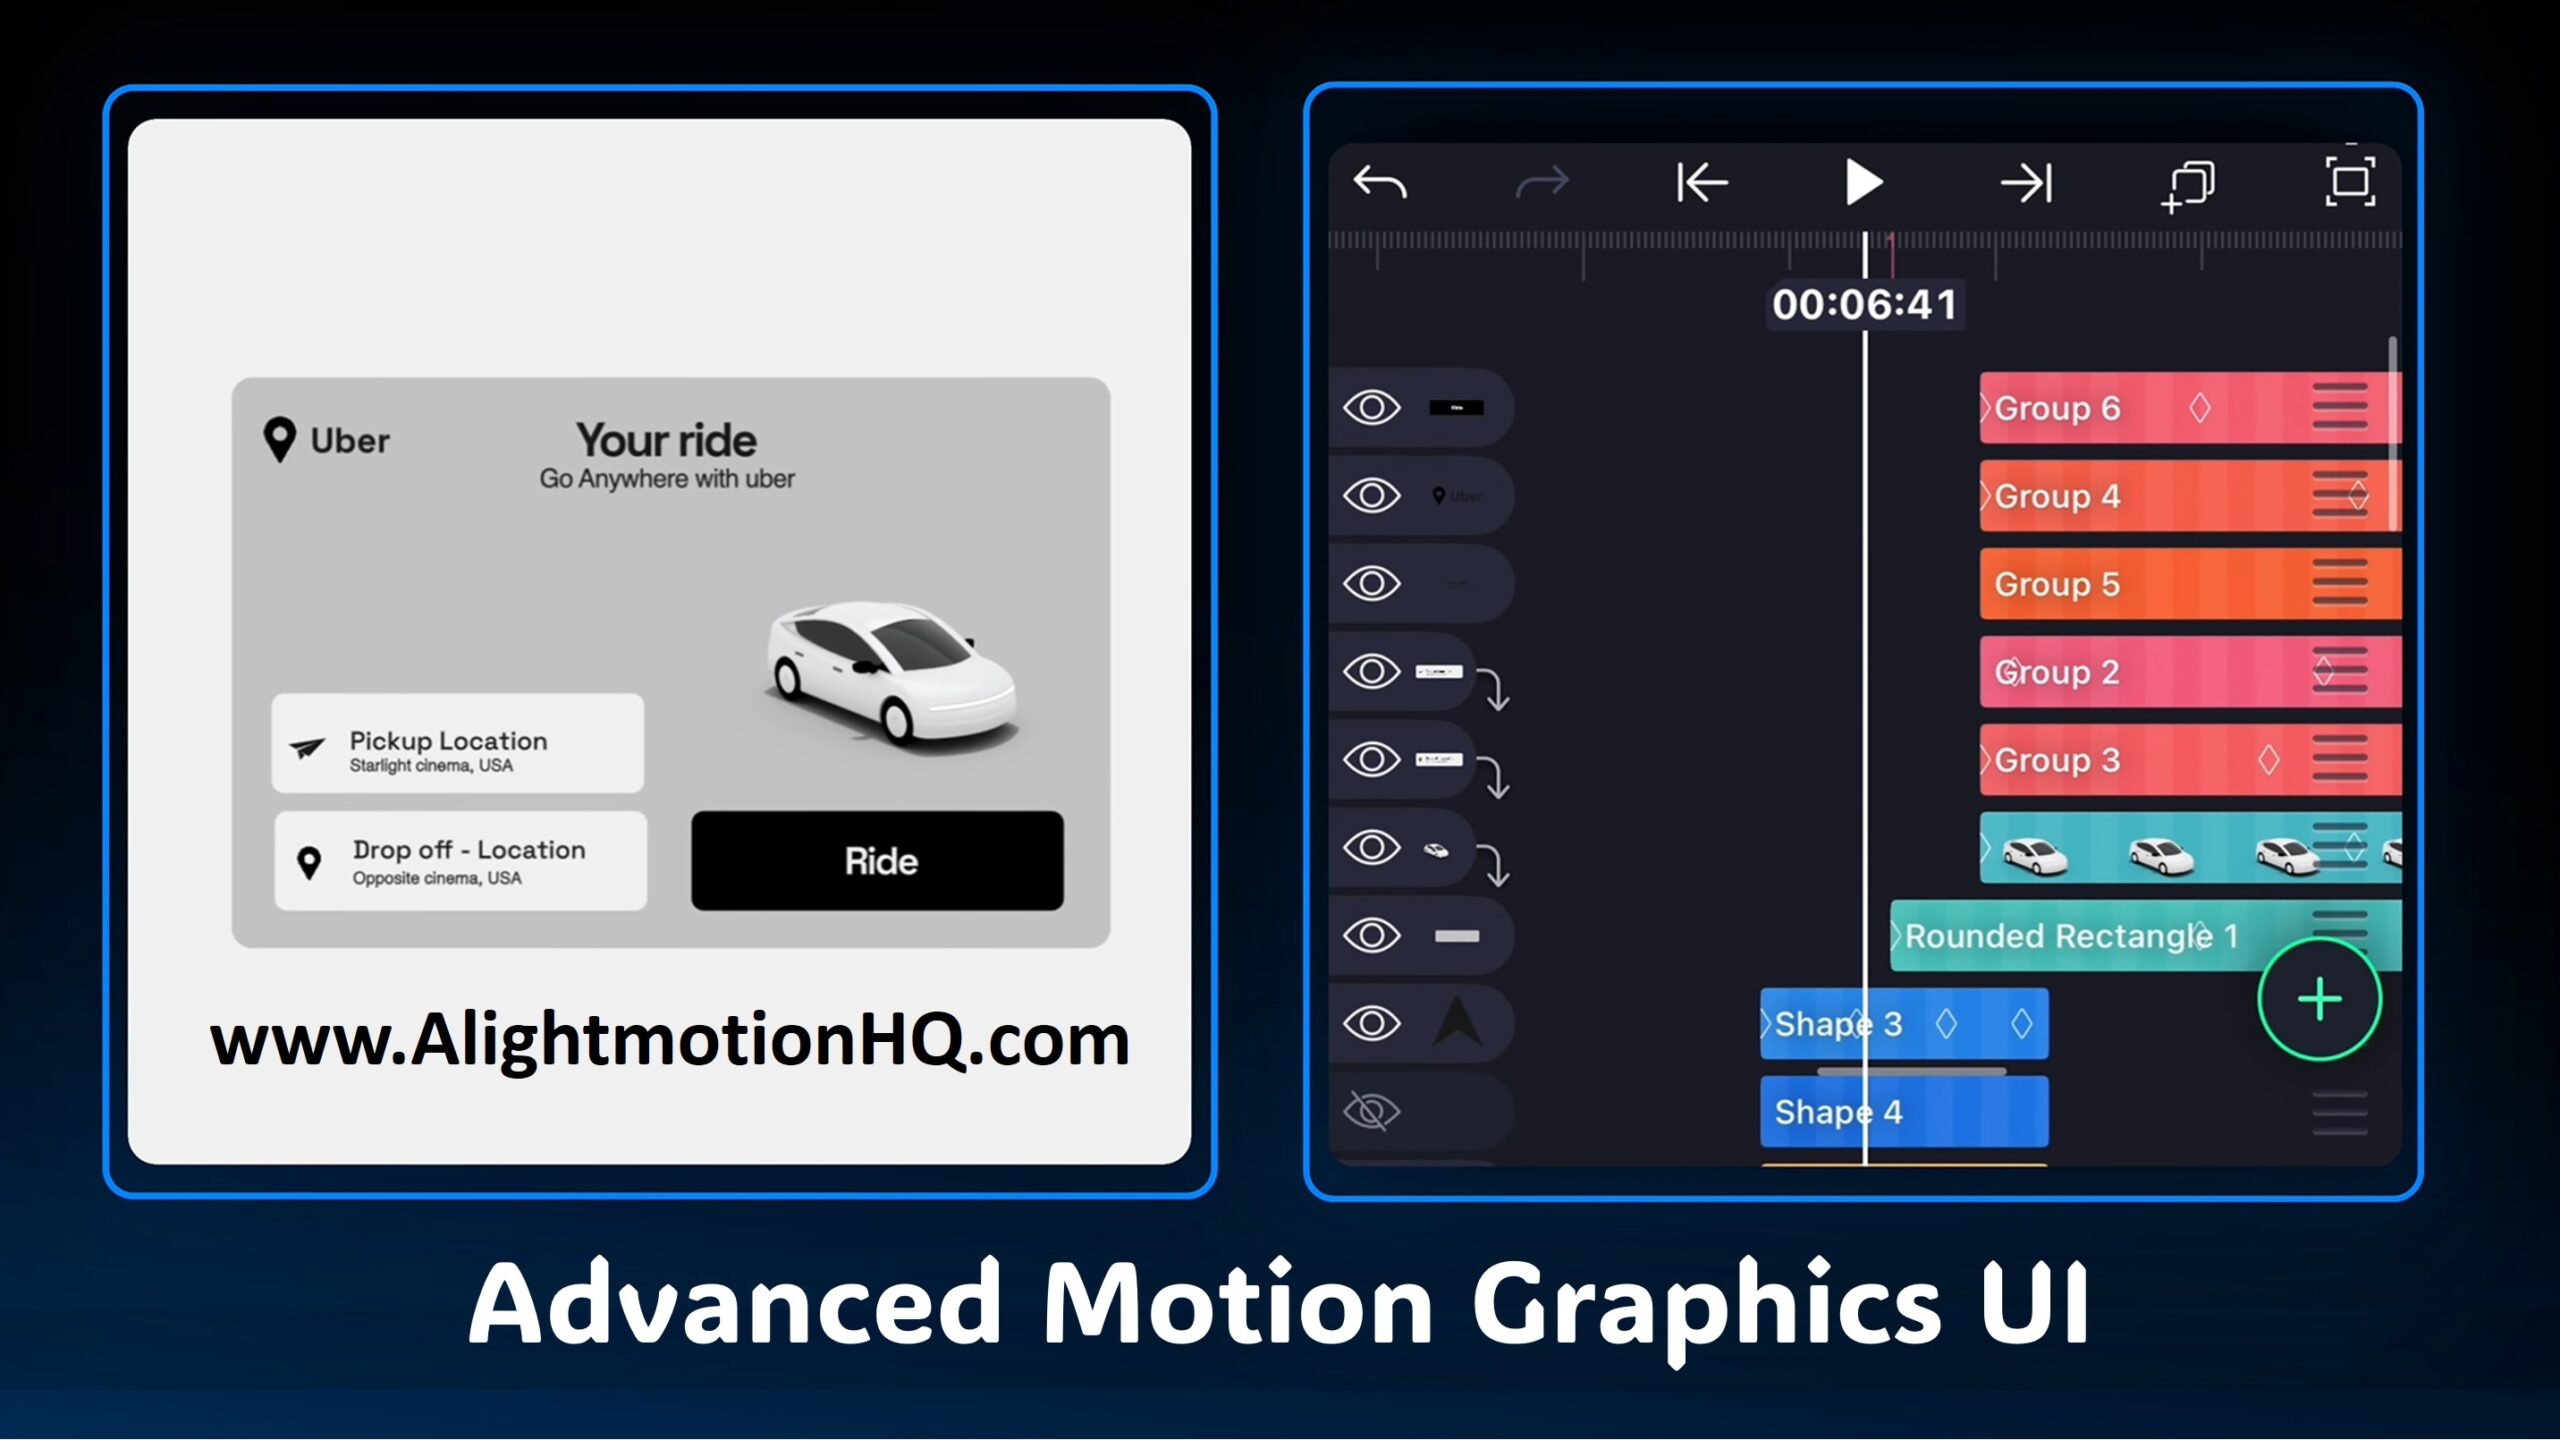
Begin by adding your text layers one letter at a time, such as “U”, “B”, “E”, “R.” This is important because each letter needs its own timing. Once the letters are in place, use Bookmarking in Alight Motion to mark key beats on the timeline. These bookmarks help you stay perfectly in sync with the rhythm of your animation.
The Jump Effect
Select all the text layers and Group them. This lets you animate the word as one object while keeping each letter editable.
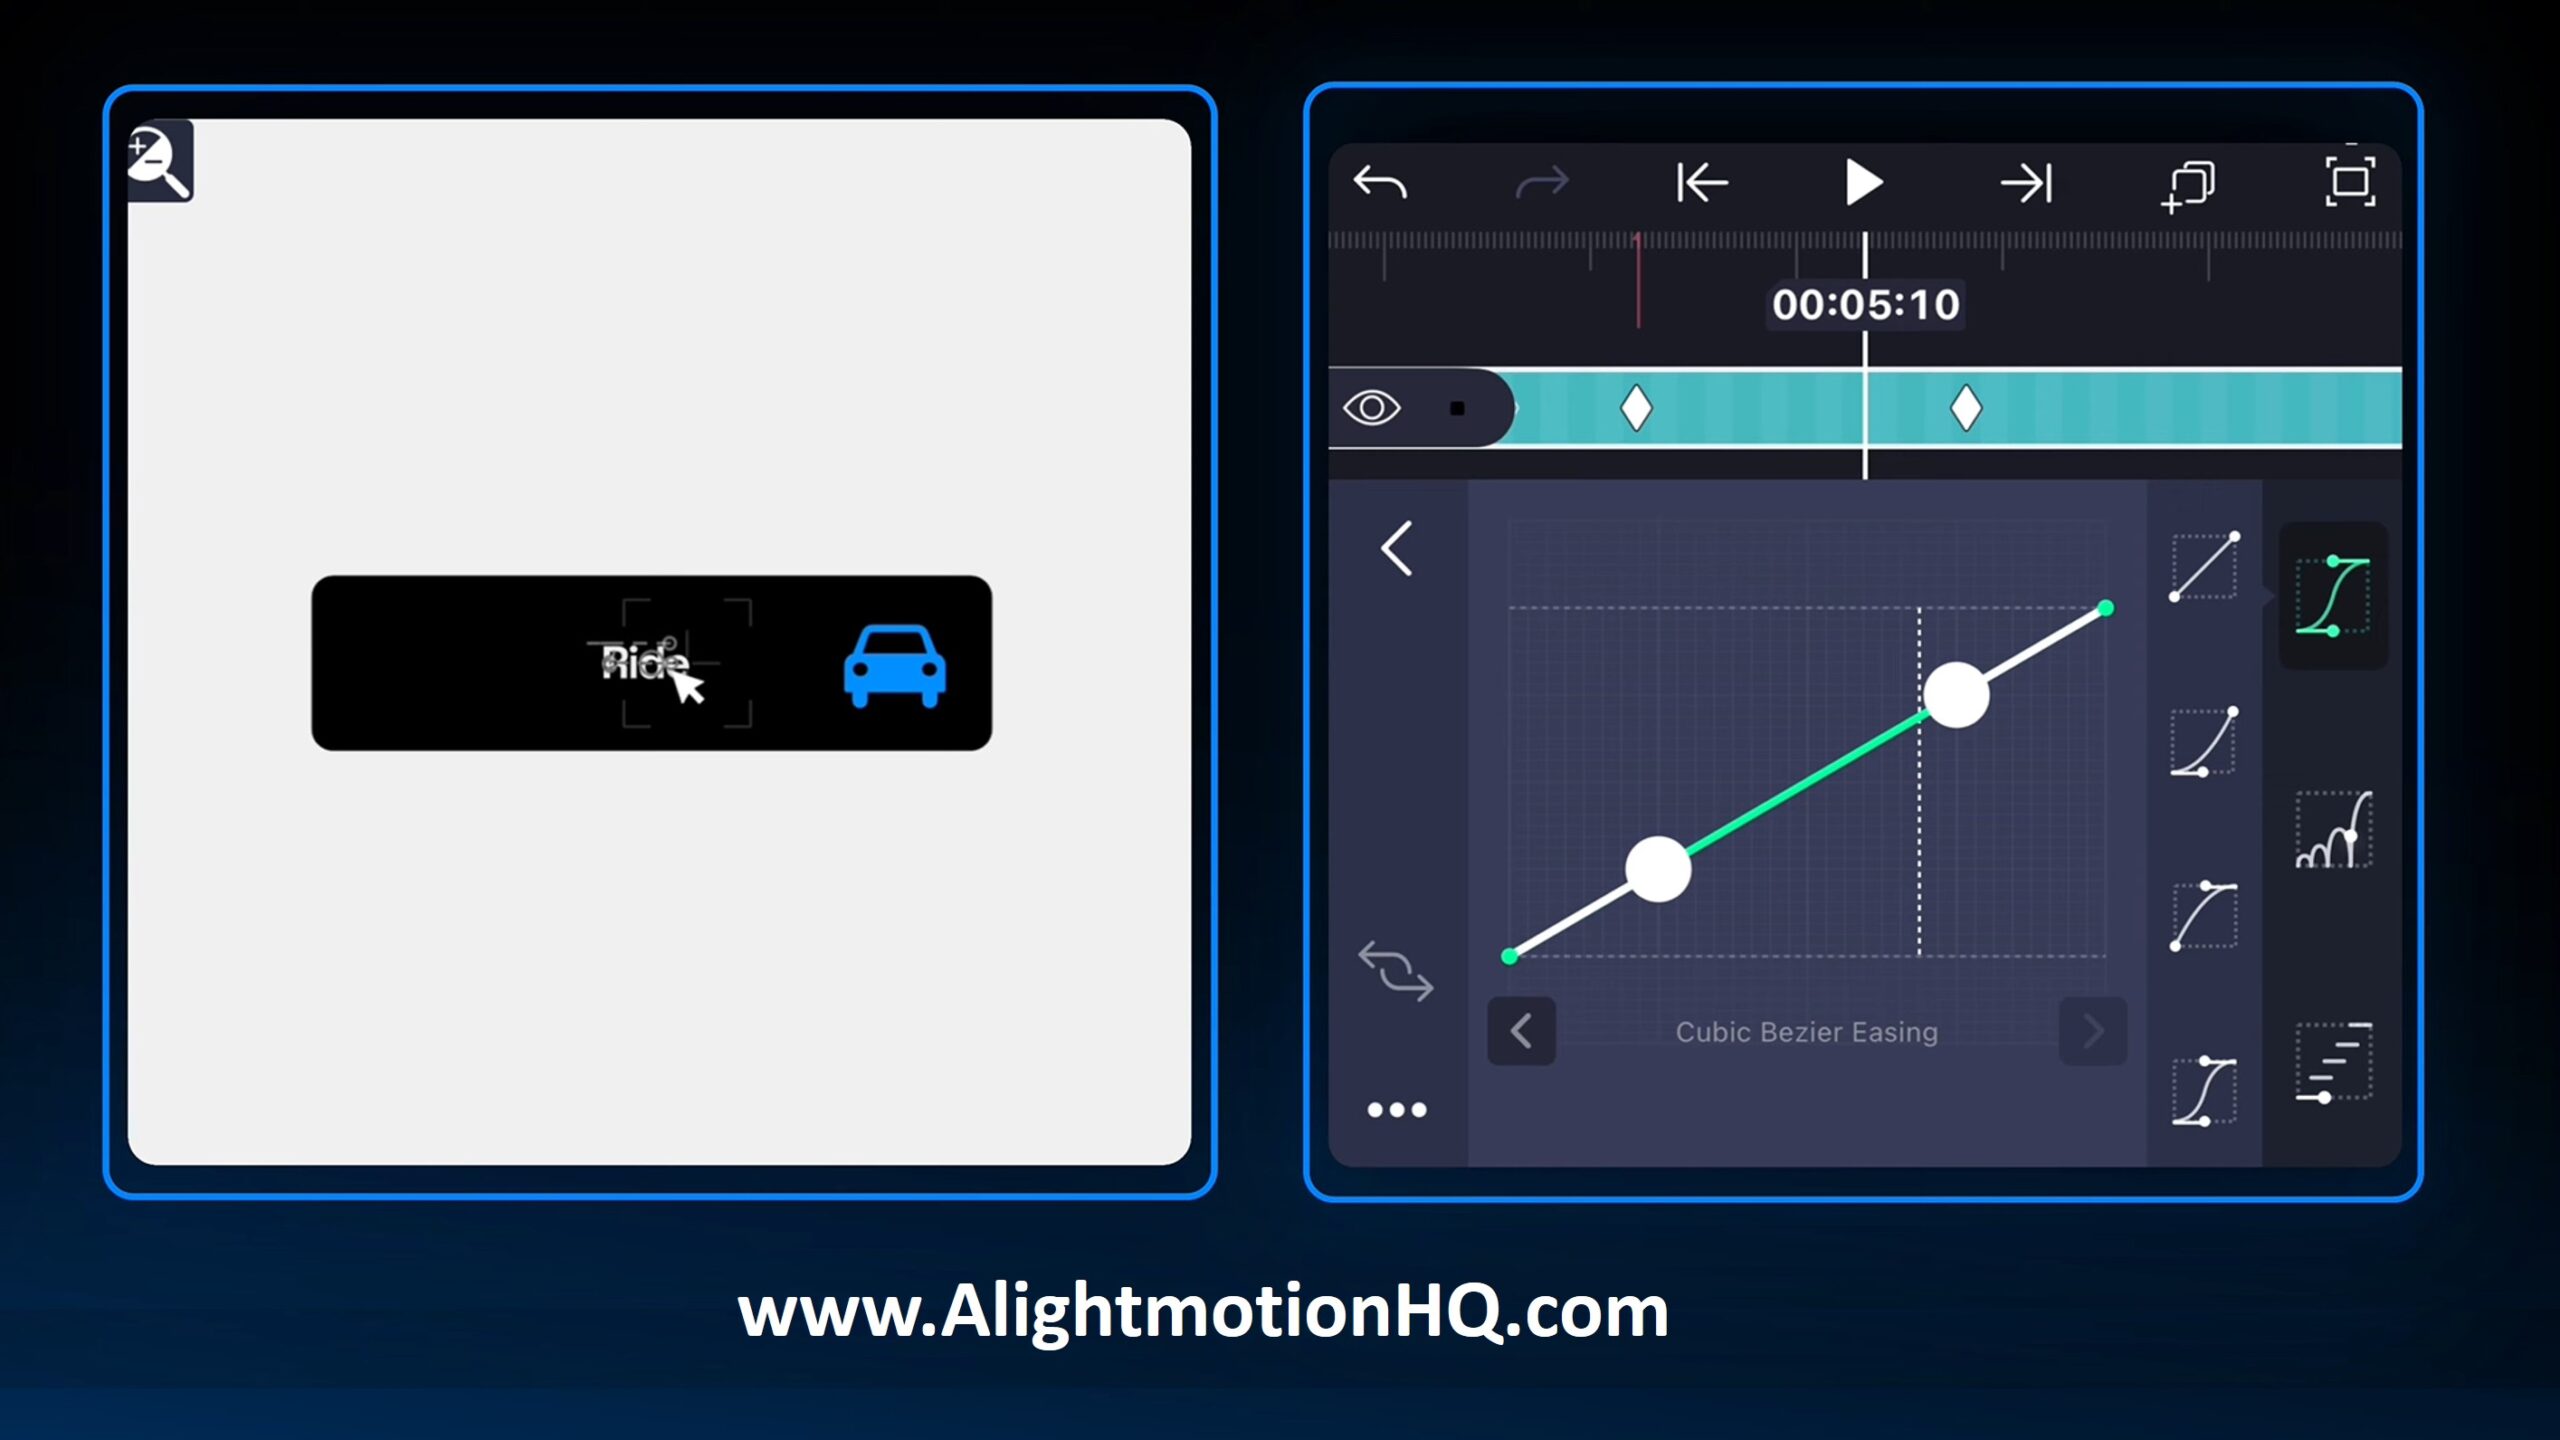
Add Position Keyframes at the start and end of the jump. Then open the Graph Editor. A straight line looks stiff and mechanical, so reshape the graph into a steep curve. This makes the text shoot upward, slow down slightly at the top, and fall naturally, just like real gravity.
The Inverted Background
At the peak of the jump, we add a quick visual twist. Create a shape layer, stretch it to cover the whole screen, and set it to white. Move it below the text layers and split it at the impact bookmark to create a flash.
Pro Tip: Change the text color from white to black at the exact moment the background turns white. This creates a stylish negative-color effect that looks modern and bold.
The Infinite Loading Loop
Instead of a boring spinner, we will create a custom looping animation using vectors.
Vector Drawing & Bezier Handles
Use the Vector Drawing Tool to draw a star loop or infinity-style path. The real magic happens in the Bezier Handles. Short handles create sharp corners, while longer handles smooth the curve, giving the motion a flowing, organic look.
Move Along Path
Create a small circle and apply the Move Along Path effect. Link it to your vector path and animate the Progress from 0% to 100%. This allows the shape to glide smoothly along the curve without manually animating X and Y positions.
Adding Physics with Echo and Motion Blur
To make the motion feel realistic:
- Echo Effect adds a trailing glow by increasing the count and lowering the alpha.
- Motion Blur simulates camera blur on fast movement, preventing the animation from looking choppy.
Together, these effects make the loader feel fast, smooth, and alive.
The Morphing Button
Now we turn the logo into an interactive “Where to?” button.
The Pop and Reveal
Apply Text Transform with a range offset. Set alpha to -1 and animate the Start range to reveal each character. Use Ease-In (100%) so the text accelerates into view, giving it a premium feel.
Squash and Stretch
When the logo becomes a button, animate both the size and radius. Use an elastic curve in the Graph Editor so the button slightly overshoots and settles back. This makes it feel soft and responsive instead of rigid.
Copy-Pasting Curves
Once you get the perfect curve, copy it and paste it onto Position, Radius, and Scale so every part moves in sync.
Null Objects and Parenting
As your UI grows, things can get messy. This is where Null Objects save the day.
Create a Null Object and parent the button background, text, and icon to it. Now when you animate the Scale or Position of the Null Object, the entire button moves together. This is perfect for press and bounce animations.
Clipping Masks and Scrolling Text
To show changing locations inside the button:
Place the text above the button shape and apply a Clipping Mask. The text will only appear inside the button. Animate the Y-position so one label slides out while the next slides in.
Simulating User Interaction
Import a mouse pointer and animate it moving over the button.
At the moment of the click, animate Scale from 100% → 90% → 100%. At the same time, change the button color to grey. This gives clear visual feedback that the action was registered.
Map and Route Animation
Draw a road using the Pen Tool and shape it with the Bend Tool. Then animate it using Trim Paths or Move Along Path.
Expand the button into a booking card by animating the rectangle’s size and radius, filling the lower screen.
The 3D Flip (Green Screen Trick)
Set the background to green and export the frame as a PNG. Re-import it, remove the green using Chroma Key, and apply Flip Layer. Animate the angle from 0° to 180°.
To fix mirrored text, rotate the back-side elements -180° so they appear correctly when flipped.
Conclusion
By combining Graph Editing, Null Objects, Clipping Masks, and clever rendering tricks, you can create professional-grade UI animations right inside Alight Motion.
Remember:
- Physics sells realism
- Organization saves time
- Visual feedback builds trust
Open Alight Motion, load your assets, and start animating. Once you master this flow, you can bring any app concept to life. 🚀