Not long ago, creating cinematic motion graphics meant sitting in front of a powerful computer and learning complex software. Today, things have changed. With a good mobile phone, creativity, and Alight Motion, you can create stunning animations that look professional and cinematic.
In this guide, I’ll walk you through the complete process of building a story-based animation using Alight Motion. We will use map animations, glowing outlines, text effects, background removal, Null-based camera movements, and advanced visual effects all done directly on your phone.
If you enjoy creating visuals and want to push mobile editing to the next level, this tutorial is for you.
What This Animation Includes
This project focuses on creating a cinematic storytelling animation. Here’s what we’ll build step by step:
- Map animation with glowing location outlines
- Smooth zoom-in camera movements using Null objects
- Stylish text animations with gradient and soft glow
- Background removal using PhotoRoom
- Ink splash transitions using chroma key
- Slow-motion zoom effects for cinematic feel
- Multiple scenes connected smoothly
- Advanced effects like blur, fractal warp, wipe, and overlays
By the end, you’ll understand how professional looking animations come together inside Alight Motion.
Importing the Map Image
Start by importing your map image into Alight Motion.
Tap the Plus (+) icon, bring the image into your project, and manually zoom it so the area you want to highlight is clearly visible. This map will act as the base of your entire animation, so take a moment to position it properly.
Creating the Location Outline with Vector Drawing
Now it’s time to highlight a specific location.
Tap Plus (+) → Vector Drawing and use the vector tool to carefully mark the area you want. Once the shape is ready, go to Color & Fill and select None. Then open Border & Shadow, enable Stroke, and choose your preferred color.
Duplicate this shape layer and rename the copy so you can easily identify it later.
Adding a Smooth Glow Effect
To make the location stand out, we’ll add a glow.
Select the duplicated shape, choose a color from Color & Fill, and slightly reduce opacity using Blending & Opacity. Reduce the stroke width, then enable Shadow inside Border & Shadow. Adjust the size and alpha until the glow looks soft and natural.
Add the Soft Glow effect, increase diffusion and outer glow, and match the glow color with the shape. At this point, the location should look clean, bright, and professional.
Animating the Outline Drawing
To bring the outline to life, select the original outline layer and add the Drawing Progress effect. Choose the preset Draw Gradually.
This makes the outline draw itself smoothly, which instantly adds a cinematic touch.
Styling the Text Layers
Text plays a big role in storytelling, so let’s make it look good.
Add a text layer and open Color & Fill. Select the Gradient option and choose your colors. Adjust the gradient direction to create a shadow-like effect. Then add the Soft Glow effect and gently increase diffusion.
Duplicate text layers when needed and adjust their positions for balance.
Creating a Location Pointer
To make the map feel more real, create a small circular shape using the vector tool. Color it red, reduce its size, and place it exactly on the location.
This simple detail works like a location pin and adds clarity to the scene.
Fading in Text Using Keyframes
Instead of using built-in fade effects, use keyframes for better control.
Select the text layer, add two Opacity keyframes, and reduce opacity on the first keyframe. This creates a smooth fade-in animation and lets you place the effect anywhere in the timeline.
Once you get used to this method, you’ll probably stop using preset fade effects altogether.
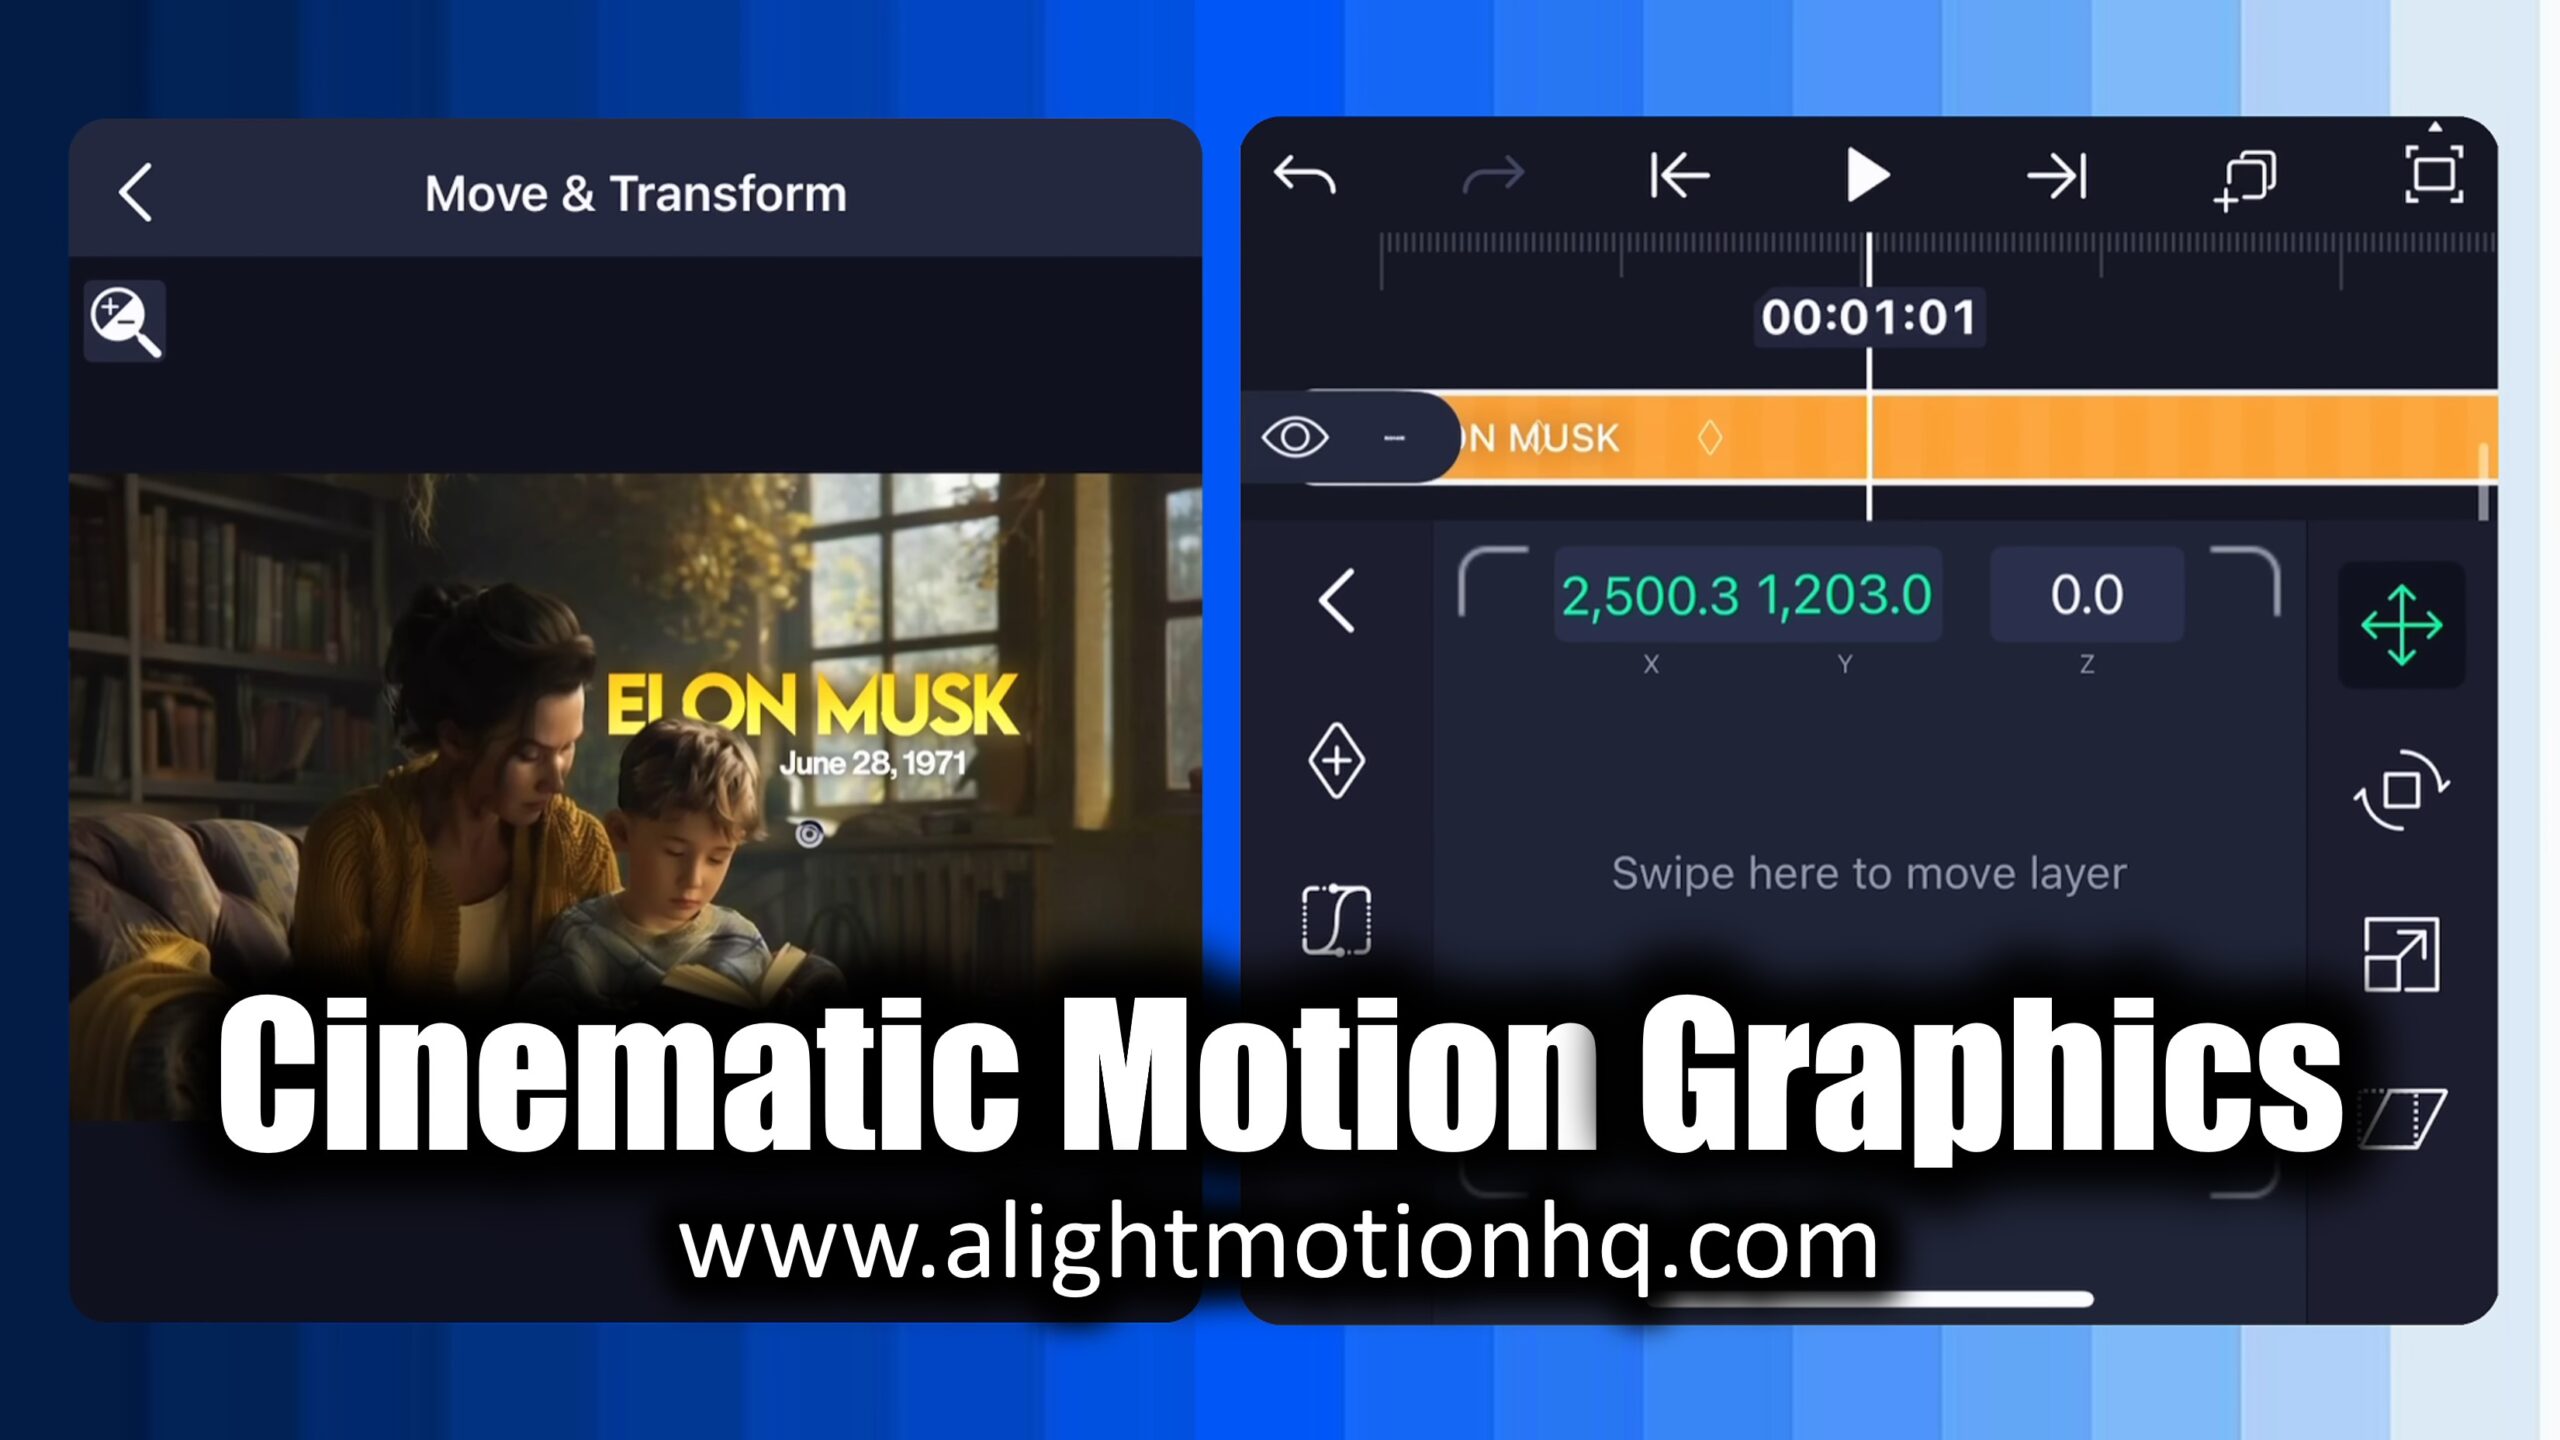
Grouping Layers and Adding Camera Movement
Now select all the layers and create a Group.
Add a Null object, then connect the group to it. This allows you to control all layers together like a camera.
Add two keyframes on the Null, adjust position and zoom, and apply a motion graph. You’ll now see a smooth cinematic zoom-in across the map.
Removing Backgrounds with PhotoRoom
For clean subject isolation, open PhotoRoom, select your image, and remove the background. Export the image as a transparent PNG.
Back in Alight Motion, import both the original image and the background-removed version. This gives you more creative control later.
Placing Text Behind the Subject
Paste your styled text behind the PNG subject layer. Make sure the Z-axis values are adjusted correctly so the text sits between the background and the subject.
This layering trick instantly makes the scene feel more expensive and professional.
Animating Text with Text Transform
Add the Text Transform effect to your text layer and select the preset Fade Up by Letter.
To enhance the movement, add position keyframes and slide the text upward slightly. Apply a motion graph for smooth entry. Repeat the same steps for other text layers.
Creating Ink Splash Transitions
Import the ink splash footage and apply Chroma Key to remove the green background. Animate its size using zoom keyframes and add a motion graph.
Group the layers and apply another Chroma Key to remove any remaining blue tones. This creates a stylish transition that feels cinematic and modern.
Using Multiple Null Objects for Smooth Motion
As the project grows, you’ll use more Null objects.
Each new Null builds on the previous one, allowing you to stack movements like zooms, slow motion, and camera shifts. Always connect the previous Null to the new one to keep everything moving smoothly.
Creating Real-Time Zoom Transitions
Use two versions of the same image one normal and one with the background removed.
Animate the opacity between them using keyframes. This creates a real-time zoom effect commonly seen in documentary-style YouTube videos.
Adding Cinematic Text Placement
Place text carefully so it sits below the subject and above the background. Connect the text layer to the subject so it moves naturally with the scene.
To make it more dynamic, animate the text entering from behind the subject using transform keyframes and motion graphs.
Enhancing Mood with Blur and Color
To push the cinematic feel further, add Gaussian or Quotient Blur to background layers. Animate the blur using keyframes so the subject stays in focus.
Add Saturation & Vibrance and slowly reduce saturation over time. This subtle change makes the scene feel more emotional and polished.
Animating the Child Scene
Import the child image and background, adjust the Z-axis, and animate the image entering from the bottom. Blur the background during this moment to draw attention to the subject.
Add Fractal Warp to the background and animate its parameters to create subtle motion and visual interest.
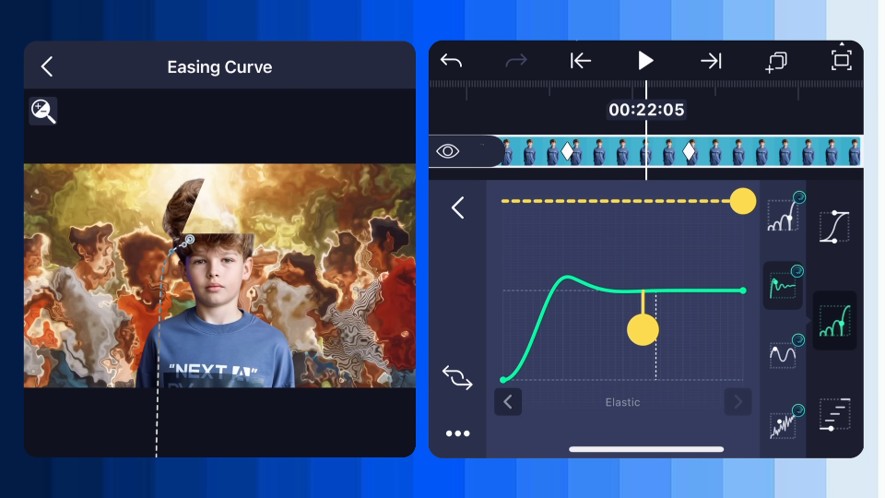
Creating the Mind Opening Effect
Duplicate the child image and apply the Wipe effect to both copies. Adjust angles and start/end values so the head opens naturally.
Animate rotation using a pivot point near the head and apply a bouncy motion graph. This creates a clean and engaging pop-up animation.
Animating the Brain Rising Effect
Import the brain PNG and connect it to the child image. Animate it moving upward using transform keyframes.
Create a vector shape matching the brain size, apply Hard Light blending, add glow, and animate opacity. Connect this shape to the brain PNG so it moves perfectly with it.
Final Touches and Overlays
Add floating question overlays and set blending to Screen or Lighten. Fade out background layers using opacity keyframes.
Finish everything with one last smooth zoom using a final Null object.
Final Thoughts
Many creators believe these animations are only possible with After Effects. The truth is, Alight Motion can deliver After Effects–level results when you understand how to use it properly.
It’s never about the software.
It’s about your creativity, patience, and dedication.
If you enjoyed this guide, try building the animation yourself and experiment with your own ideas. Mobile editing has no limits when you know what you’re doing.
Happy animating 🚀